How to Setup Billing Alarm in AWS
AWS Free Tier Account:
As we know Amazon provided a great opportunity by providing Free Tier account for Tecno enthusiast / Freshers or in reality for anyone who is trying to start their careers in the cloud world.
Free tier account really helps us to get our hands dirty, Below are the few services/resources which are highly useful while you are practicing
1) EC2 – 750 hours in a billing cycle (Monthly)
2) S3 – 5 GB
3) Lambda – 1 milling free requests
4) RDS – 750 hours per month of db.t2.micro database usage (applicable DB engines)
Any many more, here you can find more details about the Free tier https://aws.amazon.com/free
Why to setup Billing Alert?
Since many of us to try different services in different AWS regions, sometimes we may forget to shut down or delete resources which will lead to hitting your limit on the free tier, So once you hit your limit from there on Amazon will start billing for those resources we may realize that only when we get a bill. So these billing alerts will help us to notice when the resource consumption is exceeding a certain threshold that we set.
Setup Billing Alert:
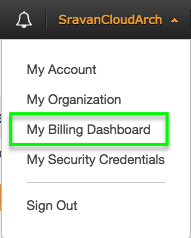
Step 1: Once you login into AWS console, you can navigate your “My Account” or ” “My Billing Dashboard” as below:


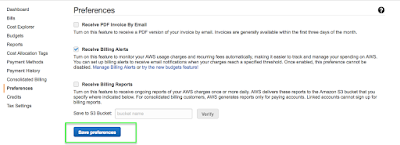
Step 2: Navigate to the “Preferences” tab from the left column


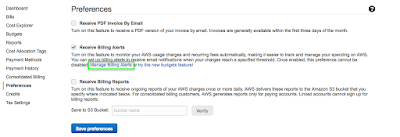
Step 3: You can choose the “Manage Billing Alerts” option as below which will open a new tab which leads to cloud watch service

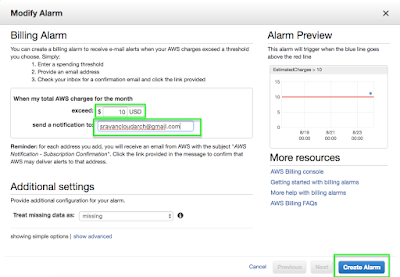
Step 4: Under Billing –> You can create New Alarm


Step 5: Once Create Alarm, You will get a notification to the given email ID as below:

You can confirm your subscription by clicking on the link
Now you have an Alarm configured and from now cloud watch is going your consumption in terms of billing and send you an alert when you exceed the billing threshold.
From now you need not pay more money then what you set threshold.
Hopefully, you enjoyed this post, here are the relevant hands-on video
